We started a tradition years ago to have a great Christmas breakfast with the family in a more layback atmosphere than the one on Christmas eve. Even if we usually eat leftover sandwiches and all the sweets we couldn’t finish the day before, we always add something fresh and new to the table. So, this year I’m thinking about the best cinnamon rolls you could find but with a Christmas decoration. You will love it and maybe get into a new family tradition.
The good thing about these homemade cinnamon rolls is that you can do it the day before and refrigerate them for the last proof before putting them in the oven, so you can have freshly baked and warm cinnamon rolls this day without all the fuss of having to wake up early to do all the proofs before people come over.
This time I did the traditional recipe with only cinnamon because we have little ones that are a little bit fussy with a lot of spices. Hopefully, next year will be different, but you can add some ginger powder and cloves powder to the cinnamon mixture to make them more gingerbread flavour. Use 1 teaspoon ginger and 1/4 teaspoon of cloves to the mix below.
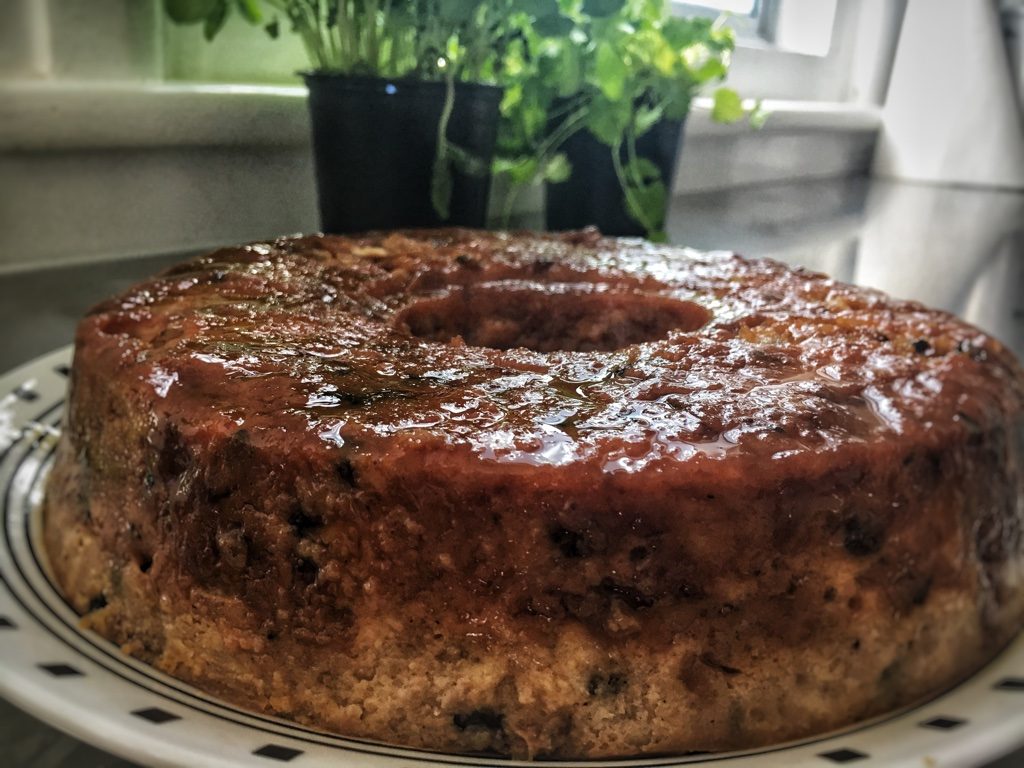
This is the first time I did a wreath for our Christmas brunch, but if you are not into that, you can cut the roll in pieces and let it be proof in a greased rectangle pan and bake the buns in a rectangular shape.

Ingredients:
Dough:
- All-purpose flour
- active dry yeast
- milk
- sugar
- butter
- salt
- eggs
Filling:
- melted butter
- sugar
- cinnamon powder
Icing:
- powdered sugar
- vanilla extract
- milk
Decoration:
- red chocolate candies
- leaves
- ribbon

Prepare a rounded or cookie sheet with parchment paper for later if you want to bake them in a conventional way, grease a rectangular pan.
In a small saucepan over low heat, melt the butter with the sugar, salt and milk. Let it melt but not simmer; we want to stay warm but not hot. In case it happens, please let it rest until it is warm. Put in a bowl the 2 cups of flour and the active dry yeast and pour the warm milk mixture. Beat for 3 minutes, add the remaining flour, and mix with the hook attachment for 10 minutes; if you don’t have it, put the dough over a floured surface and knead it for 10 minutes. Form a ball, let it rest in a greased bowl, and cover it with plastic wrap and a clean towel. Place dough in a warm place with no winds. Let it rest for an hour or until it doubles its volume.
Roll the dough with a rolling pin into a large rectangle on a lightly floured surface. (More or less 20 by 30cm) spread the filling uniformly by putting the dough. Roll the dough from the longest side. Cut the two uneven ends and join the roll to form a circle. Cut the roll into slices without reaching the end, so they are still connected from the inner circle. Let the dough rise and rest for another 30 minutes. (This is the moment you can refrigerate them for the following day and let them stand at room temperature for 20 minutes before baking)
Preheat the oven to 180C and bake the cinnamon roll for 20 to 25 minutes until golden brown. Meanwhile, in a small bowl, combine confectioners’ sugar, melted unsalted butter, vanilla extract and milk. Add one tablespoon of milk until you reach a good consistency, like a heavy sauce.
After the cinnamon rolls come out of the oven, the first thing to do is pour the icing to let it melt a little through the buns. Let it cool down for 15 minutes before serving. Everyone around you will be craving one piece because of the beautiful aroma.

Frequently Asked Questions about the recipe:
Yes, I have used both, and the results are good with both; only the bread flour will rise quickly for its consistency.
Yes, it is the same principle, but instead of forming a ring with the roll and then cutting the slices. You will cut the roll into 12 even pieces and put them in a rectangle pan to proof with the film and clean towel.
Yes, you can do it up to two days in advance and let it in the refrigerator for the final proof (when they are in the form, you will bake them). Only check that you wrap the pan well with plastic to prevent some dry patches and absorptions of flavours from the fridge. You only have to take them 20 minutes before baking them to room temperature and then bake them as usual.
Christmas Morning Cinnamon Rolls
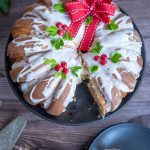
These Christmas morning cinnamon rolls are a great recipe because you can make them the day before and entertain them for breakfast without the fuss of making bread from scratch the same morning. So, you can start a new tradition of Christmas morning breakfast. And what is the best to wake up your loved ones with this amazing smell of cinnamon rolls?
- Prep Time: 90 mins
- Cook Time: 20 mins
- Total Time: 1 hour 50 minutes
- Yield: 12 pieces
- Category: Dessert
- Method: Baking
- Cuisine: International
Ingredients
Dough:
- 4 – 4 1/2 cups of All-purpose flour or bread flour
- 1 sachet of active dry yeast (7 grams)
- 1 cup of milk
- 1/3 cup of sugar
- 1/3 cup of butter
- 1/4 teaspoon of salt
- 2 eggs
Filling:
- 3 tablespoons of melted butter
- 1/2 cup of sugar
- 2 teaspoons cinnamon powder
Icing:
- 2 cups of powdered sugar
- 1 teaspoon of vanilla extract
- 3 tablespoons of milk
Decoration:
- red chocolate candies
- leaves
- ribbon
Instructions
- In a small saucepan over low heat, melt the butter, sugar, salt and water. Don’t let it simmer; we want this mixture to be warm, not hot. Otherwise, we have to let it rest until it becomes warm.
- Meanwhile, put the yeast and two cups of flour in a stand mixer bowl with the hook attachment. Pour the warm mixture over the dry ingredients and mix it a medium-high speed for a couple of minutes. Add the eggs and mix them well. Then add the remaining cups into the mixture mixing well at medium speed after each addition, then let it knead for 8-10 minutes. If you don’t have a stand mixer, you can do the same in a large bowl mixing first with a wooden spoon and then when it gets heavier with your hands. Then on a lightly floured surface, knead the dough until it becomes a ball. Let it stand in a clean, greased bowl covered with plastic wrap and a clean kitchen towel for about an hour or until it doubles its volume.
- Meanwhile, prepare the filling by mixing 1/2 cup sugar, melted butter and cinnamon powder. Set aside.
- It would be best to roll the dough over a floured surface to make a rectangle when it has risen. Spread the filling evenly and make a roll starting from the long side of the dough. Cut both edges (usually uneven) and join the two ends to form a ring. Cut the rolls only 3/4, leaving the inner circle without touching them. They will remain united by the inner circle. Put them over a greased or buttered surface (or a pan with parchment paper) and let it proof again for 30 minutes with a plastic towel over the dough. If you are going to do it the day before, this is the time to put them in the refrigerator all night and let it at room temperature for at least 20 minutes before baking.
- Preheat the oven to 180C and bake them for 20-25 minutes or until golden brown. Meanwhile, prepare the vanilla icing by mixing the milk, powdered sugar and vanilla. Pour the icing over the cinnamon rolls as soon as they come out of the oven.
- Let it cool down for 15 minutes, and enjoy these cinnamon buns with your family.
Hi! I’m Valeria (aka Val) the photographer and recipe developer behind Canguro Criollo. My passion for food began when I was little at my home when everything will revolve around food and now I discover this new creative outlet of food photography. I wish you can follow my journey discovering unique ways of preparing Peruvian food abroad and some other family-friendly foods.